Showing posts with label Austin Mini. Show all posts

Saturday, May 16, 2020

Saturday, February 27, 2016

Austin Mini Maintenance Woes


As soon as I got the brakes sorted...


...I had the exhaust leak fixed. 


In preparation for the summer heat, I installed the 
heater matrix 
to function as an auxiliary radiator.


I was about to take out the clutch master cylinder 
to clean up the rust, but it was too late.

Now I have to wait a few weeks for a replacement clutch master cylinder ;(

Friday, July 31, 2015

SJ4000 + Kingone K5

Don't worry folks, JE Labs has not ditched retro tech.


I just needed a cheap video cam to capture my treks in the Mini + a cheap bluetooth speaker which disappears in the dashboard and prevents road rage in Manila traffic, even on weekends ;)


 SJ4000 factory default settings at 1080p 30fps

At less than half the price of an entry level Go Pro Hero, the video quality is good enough for my purpose. As I get to know the menu and settings, I might tweak it a bit later. 


Original 720p 30 fps color video converted to B&W

I've paired CD quality tracks from my iPhone with Bose, Braven, JBL and other touted/branded bluetooth speakers in showrooms but could never justify their cost to sound value. Just like the others, the Kingone K5 has a built-in EQ network which aids the tweeter-sized drivers in fooling the ears to hear a bigger than actual sound by boosting the frequency extremes. Kudos to Kingone engineers for designing an EQ curve which does not muddy the midrange, renders clean bass overtone clues and is rid of tinnitus inducing highs. 


Default settings @ 720p 30fps

The savings from buying cheap clones can be appropriated for retro tech projects ;)


Wednesday, March 11, 2015

Saturday, December 28, 2013

Water Pump

visited a friend the day after Christmas. On the way home the water pump started squealing badly ;(

The radiator and fan had to be removed.


Old pump off - I hosed the water jackets in the engine block and cylinder head until the water became clear. Lots of rust.


New water pump to the left ready for installation.


Done - elapsed time ~ 2.5 hours

Friday, September 6, 2013

Aux fan install +

Insurance from heavy traffic in the tropics

radiator had to come off...

fan mounted in the driver side wheel well

pull the switch
when the temp gauge reads past 
normal


Routine maintenance

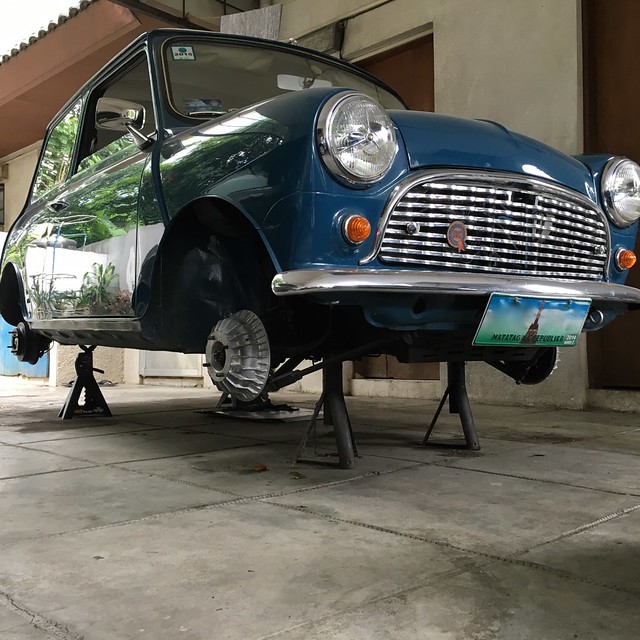
Brake job - new wheel caps

exhaust system alignment - center box gets jarred on humps

check wheel alignment

Saturday, October 27, 2012

Austin Mini Cockpit

A bit of tidying up...


Oil pressure gauge not connected, yet...;)


...hope Sir Alec doesn't mind ;)

Saturday, September 29, 2012

Austin Mini - Cylinder Head

Top overhaul was my highest priority until the clutch slave blew which led to a total clutch rebuild

Spark plugs from cylinders 2 and 3 were comparatively sooty despite my efforts to optimize carburetor mixture and the engine was running a bit too hot for comfort. Let's be an optimist and list possible causes:
1. Head gasket no longer sealing properly between cylinders
2. Manifold gasket leak
3. Both!

Materials - head, manifold and valve cover
gaskets + valve seals
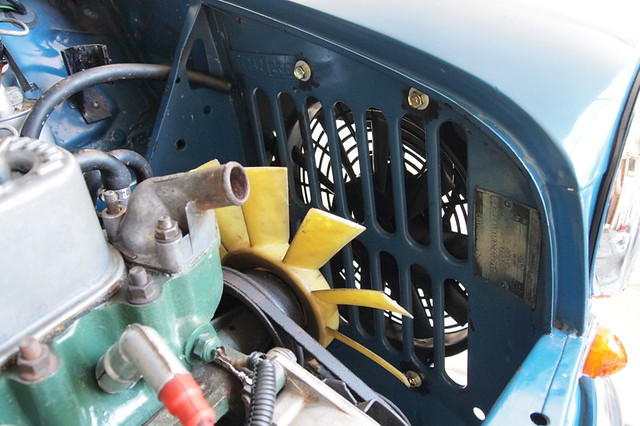
rocker arm cover off
push rods clearly labeled as they came off
cylinder head off
decarbonize
combustion chambers > ports
rocker arm, valve springs and studs
cylinder head components
after cleaning
Pistons, rings and bores showed no signs
of major wear after cleaning

valves were clearly labeled while dismantling
slight lapping of valves before reassembly 
Unfortunately this head has not been modified for unleaded fuel use and could not find a source for hardened exhaust valve seats locally ;( Since I did not want to risk parts getting lost, everything was reassembled. Hardened valve seats = back job to be pursued ASAP!

new valve seals installed, cylinder head
cleaned and ready for mounting as
new head and manifold
gaskets await....

Thermostat blanking sleeve

It is so typical in the tropics for uninformed mechanics to take off the thermostat as a cure all for overheating problems. So I did some research and found this information at Mini Spares:

Removal of the thermostat helps reduce engine temperature, however a thermostat blanking sleeve should be fitted to maintain correct coolant circulation to the entire head. Failure to do so will cause overheating around numbers 3 and 4 combustion chambers with obviously disastrous results. When the blanking sleeve is used, it is also necessary to blank off the by-pass hose (not found on late heads) between the head and water pump.

Fortunately some local Mini enthusiasts already knew this and a blanking sleeve was sourced locally. But the thermostat cover was practically welded by rust. Since the studs and cover were not available locally, it had to be coaxed out out patiently...

...finally it gave up
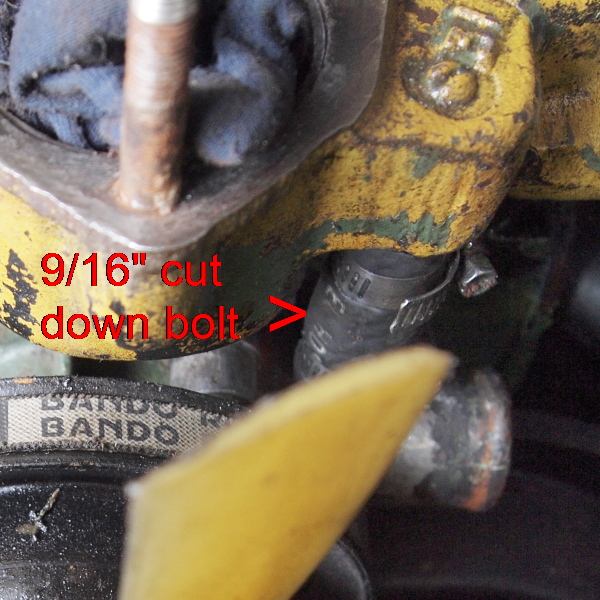
1/2" water plugs unavailable
instead we used a bypass hose with a 9/16"
piece of metal from a bolt stuck in the middle
Given the proximity between the water pump and the cylinder head, the water pump had to come off. Fortunately it was already one of those late deep/cast impeller type in good condition ;)

new gasket + blanking sleeve
done...
Not quite - change oil + fit a new filter...


Valve/tappet clearances (.012") had to be set using the rule of 9 -
as pictured above, valve 4 fully open (most compressed spring) valve/tappet 5 is adjusted, thus 4 + 5 = 9, 1 + 8 = 9, 2 + 7 = 9 and so on...

Fiddled with the carburetor mixture, checked contact point gap and ignition timing with a strobe. The Mini is now running better (cooler) than ever and no more sooty spark plug electrodes.

I am now searching for a competent local machine shop that can fit hardened exhaust valve seats and use stainless steel bolts/studs for the thermostat cover. Maybe that machine shop can also help me with the clutch lever arm + plunger? Wishful thinking ;)