Since Denon recommends a 1000 ohm load for flattest response, I tried soldering a 1k ohm resistor in parallel with the 47k input (47,000 x 1000/47000 + 1000 = 980 ohms) of my variable EQ phono preamp. Unfortunately, the sound became even more glacial.
I could have been basking in warmth by now (without losing stereo LP compatibility) if I saved up for an Ortofon SPU mono but the DL102 body fits a Gray Research or clone tonearm slide perfectly. Besides, I would rather add more stereo SPUs to my cache.😉
Since I've been using 1:1 line transformers as digital sound processing devices at the output of my CD players for ages, I decided to try the same trick by wiring the Altec 15356 and UTC A20 with a mild step up - 150:600 and 125:500, respectively. Even if both primaries reflected significantly less than Denon's recommended 1000 ohms, what I heard encouraged me to continue to experiment.
Although I'm not anal retentive about impedance matching, I was curious too see if the sound would improve by using transformers that reflect at least twice the 240 ohm internal impedance of the Denon DL102. I managed to procure the three transformers above: to the left is allegedly a Tamura 600:3k, then I tapped the McMartin MT-4's 10k:60k winding, and at the center is a permalloy 10k:40k, which sells for about $50/shipped from Chinese sellers on AliExpress and eBay.
In the context of my mono hifi set up, the McMartin MT-4 was a bit too warm for my taste. However, even if I upload videos merely for the visual spectacle, the permalloy (above) and Tamura (below) transformers are lush enough for me.😉
Canon P + Canon 50mm f1.8 Foma 100 in Rodinal 1+50
After many decades of collecting and using classic audio equipment and film cameras, I've learned to accept that sometimes I win, sometimes I lose, but most of the time I break even. And the only reason there is that possibility of breaking even is because I learned to DIY.
This tonearm came with a KS Musicmaster Model 25B12GST idler-driven turntable, which I thought I could resuscitate. Alas, the turntable was beyond saving because a lot of important parts were missing. The tonearm had no head shell slide and the cartridge pin contact points + wiring harness were gone. For many years this tonearm was boxed up along with other parts units sitting in storage.
One day I had an epiphany - will the Karmadon head shell slide fit?
I'm happy to report that the two types of head shell slides that my buddy, Sergiy, manufactures for his Gray Research tonearm clone work on this Japanese clone as well as on my original Gray Research 108C. Above left is a solid shell and on the right is a shell with a hole to accommodate the triple play feature of the General Electric RPX and VRII mono cartridges.
Despite the carnage brought upon the Ukrainians by a deranged autocrat, my Karmadon head shells arrived in less than two weeks. We really have to admire and support these people!
I rewired the tonearm and blu-tacked 4 pennies to make up for the lost hardware.
A blob of 600,000 cSt silicone fluid was injected into the uni-pivot bearing cup.
Since the Karmadon head shell slide is lighter than the original, I used all three copper weights Sergiy provided, added 2 x 5 centavo coins + the GE VRII cartridge = 25 grams.
I misplaced my VRII cartridge pins 😞...but after a bit of head scratching, I hacked two tube pins from a dead octal based tube and soldered them to the signal wires.😊
Voila!👍
For more viscous damped tonearm set up information, please click here!
Even with my 20+ years of experience using this tonearm, it took me a while to dial-in the proper weight compensation due to the missing hardware + adapted head shell slide. Getting a viscous damped tonearm to function properly isn't for the faint of heart and requires patience. If you don't possess these virtues, I suggest you don't consider using one. But I must say the results are well worth it!😊
In the early 2000s, the swinging tonearm mount of the Shield MO-19 caught my attention because it looked like the perfect partner for my Velvet Touchviscous damped tonearm. It turned out that this Japanese 4-speed idler-driven turntable is actually a rebadged NEAT P58H.
I got this NEAT P58H + Tokyo Sound ST900 tonearm when Tish and I returned to the States in 2016. It wasn't as well kept as the MO-19 and required a bit more fettling.
The turntable is built on a heavy duty cast chassis with a 1.5 kg cast aluminum platter. Aside from a few discussions in audio forums, the only literature I've found about this particular model is the 1960 NEAT catalog available for download at vinylengine.com.
Everything I've done to my NEAT P58H and Shield MO-19 is documented below.
Idler wheel + idler arm
The rubber on this NEAT P58H idler wheel was in good condition except for a pinch, which couldn't be removed by minor grinding. So I sent it to Terry E. Witt for new rubber.
The idler wheel arm action should be snappy. If it isn't, back off the nut a bit and/or add a bit of light oil to the sliding surfaces.
A good balance between speed accuracy, torque, and low noise can be achieved by adjusting the idler wheel contact pressure to the inner rim of the platter.
Unplug the turntable from the AC source and manually spin the platter CW or CCW. The platter should gently stop when the speed control knob is turned to any of the speed settings as the idler wheel engages the inner rim of the platter. If the platter stops abruptly or doesn't stop at all, go back to the preceding procedure and adjust the idler wheel position on the idler arm accordingly.
60 Hz pulley dimensions +
red arrow indicates the pulley's set screw for height adjustment
While the turntable is disconnected from the AC source and the speed selector set at 33 rpm, I set a 1-1.5mm clearance so that the idler wheel doesn't touch the shoulder of the 45 rpm step.
Speed Selector Mechanism
With the speed selector at the 78 rpm setting, make sure there's no clearance between the tip of the set screw and the piston which raises and lowers the idler wheel arm mechanism.
Before we move on, how about a track from Style Council?
Motor
The turntable is powered by a fairly substantial 4-pole hysteresis synchronous motor.
Through the years I've gotten requests for a schematic because some of these turntables were hastily pulled out of installations by flippers for quick bucks on eBay.
Spring suspended motor = less vibration
Top view of the motor + sub-chassis
The deteriorated bottom rubber mounts (red arrows) can be replaced with rubber grommets.
To remove the motor, unsolder the motor wires from their respective connections. Use my hand drawn schematic above as a guide. Then, remove the four nuts marked with blue arrows.
Before pulling out the motor entirely, I marked its orientation (black arrows) in the sub-chassis for easier reassembly.
To disassemble the motor, remove the four nuts marked by the yellow arrows.
Motor parts ID
The top and bottom shells house the sintered bearing well and are almost identical in construction except for an exit hole on top for the motor spindle. I marked the partially visible sintered bearings (or bushings) with blue arrows. To access the bearings for cleaning, remove the spring clips marked with green arrows.
As shown in the picture above, the bottom shell has a thrust pad. I clean sintered bearings by soaking them in solvent, either lighter fluid (Naphtha) or isopropyl (91% or greater) alcohol (IPA) overnight. For lubrication, I use blue 3-In-One SAE 20 motor oil.
The parts inside the bearing well are numbered in sequence for reassembly.
To access the motor bearing, remove the bottom cover, which is held by three small screws + lock washers. Be careful not to lose the tiny 3mm ball bearing. Clean all the components with either Naphtha or IPA. The numbers indicate the sequence for reassembly.
The motor should now be whisper quiet in operation.
Just like the Shield MO-19, I also found old grease at the end of the threaded bottom cap of the main bearing of the P58H. The lack of an oil seal in the threaded bottom cap further confirms that this is a grease bearing design.
These are the main bearing components after cleaning (soaked in solvent overnight). They're ready for fresh grease and reassembly. I used Phil Wood grease left over from my Raleigh 20 restomod folding bike project.
The Garrard 301 grease bearing makes the NEAT P58H bearing look diminutive.
CODA
Although innovative in its own right, the various pictures show that the mechanical design and manufacturing quality of the NEAT P58H/Shield MO-19 isn't quite as sophisticated as the illustrious Garrard 301, 401, or Thorens TD124. I never envisioned it to equal those revered models in terms of performance. However, IMHO and experience, a reconditioned NEAT P58H is a worthy alternative to a restored Lenco or Rek O Kut.
It's been over five years since I built this loctal preamp. I moved it recently so that it'd be between my two turntables. In this location, I was surprised by higher-than-usual hum and noise levels emanating from the phono section especially when compared to my RCA octal+ 76 line stage.
Given that it had been playing quietly and flawlessly until it was relocated, I was dumbfounded. Then I noticed that when I put my hand close to either 7F7 tube, the hum and noise got even louder.🤔
Before taking the preamp out of the system for a thorough check up on the test bench, I searched for a couple of tube shields from my parts bin.
Ever since I discovered the Shield MO19 (aka Neat P58H) and Realistic MkVII at the turn of the new millennium, I've become fascinated by, and in the process have collected a few Japanese idler-driven turntables. To my ears, none of them measure up to the Garrard 301, 401 or Thorens TD124. However, the models I'll be covering in this series, IMHO, offer great musical value for money when properly sorted.
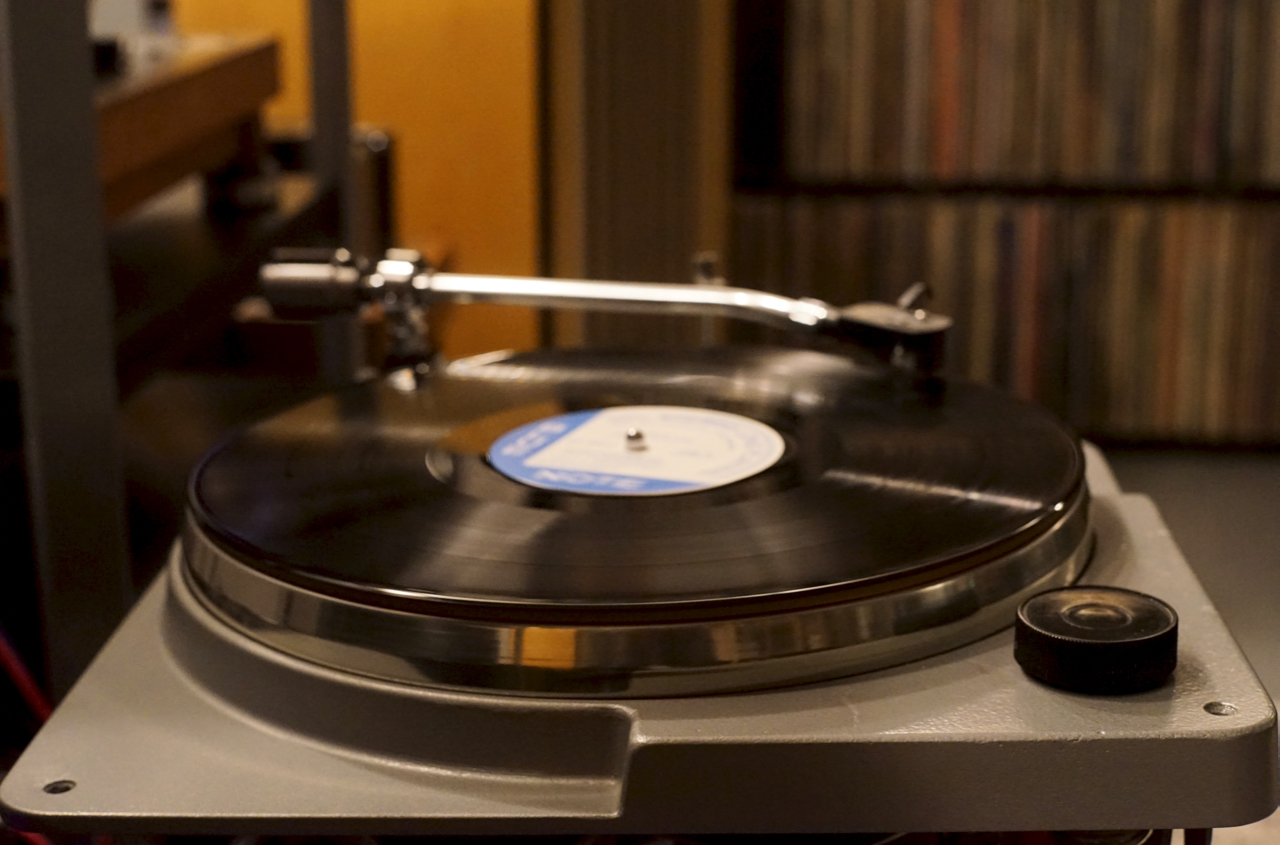
For this initial installment, I'm featuring the Pioneer PL6U, which I used as an interim turntable when I returned to the US in 2016. It's the little brother of the Pioneer PL7, which was built to much higher specifications.
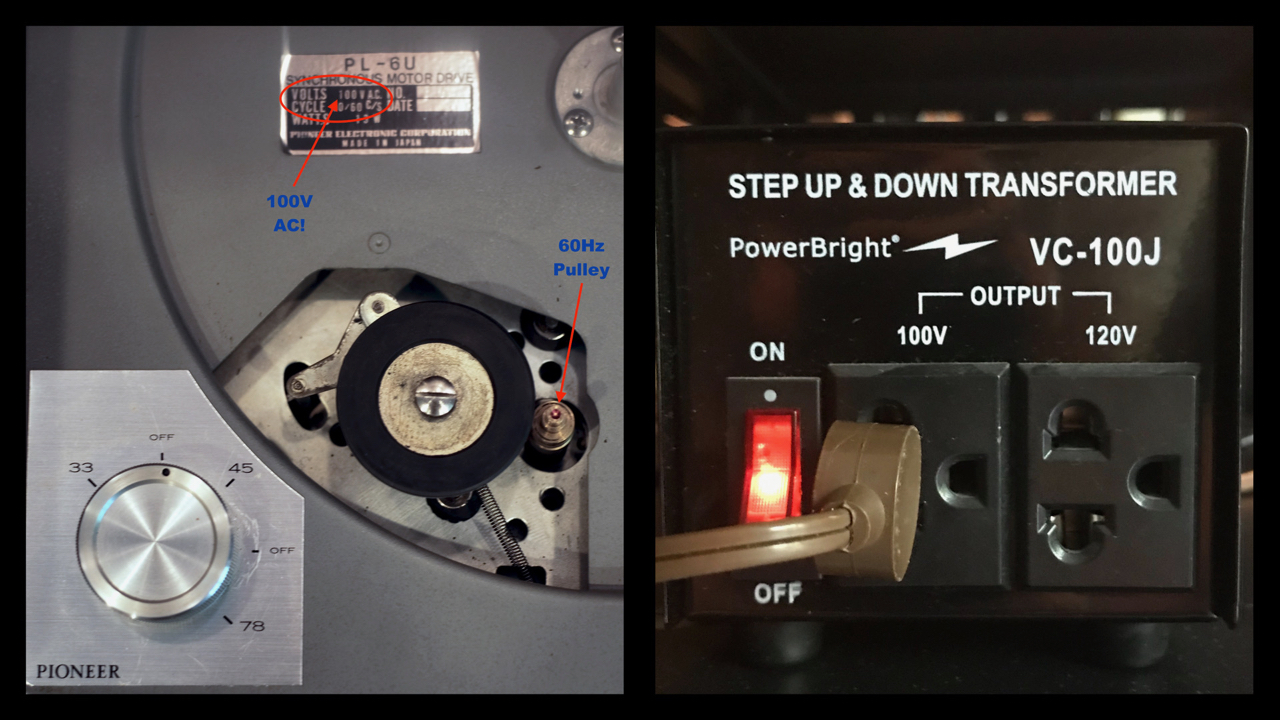
With a 100V AC motor fitted, the PL6U was a 3-speed turntable made for the Japanese domestic market. Both 50Hz and 60Hz pulleys are supplied since both AC frequencies are used in Japan, depending on which part of the country you're in. As pictured, the 60Hz pulley is installed since that's the AC frequency in the US. I use a 100W step up/step down transformer to make sure the motor is fed exactly with 100VAC.
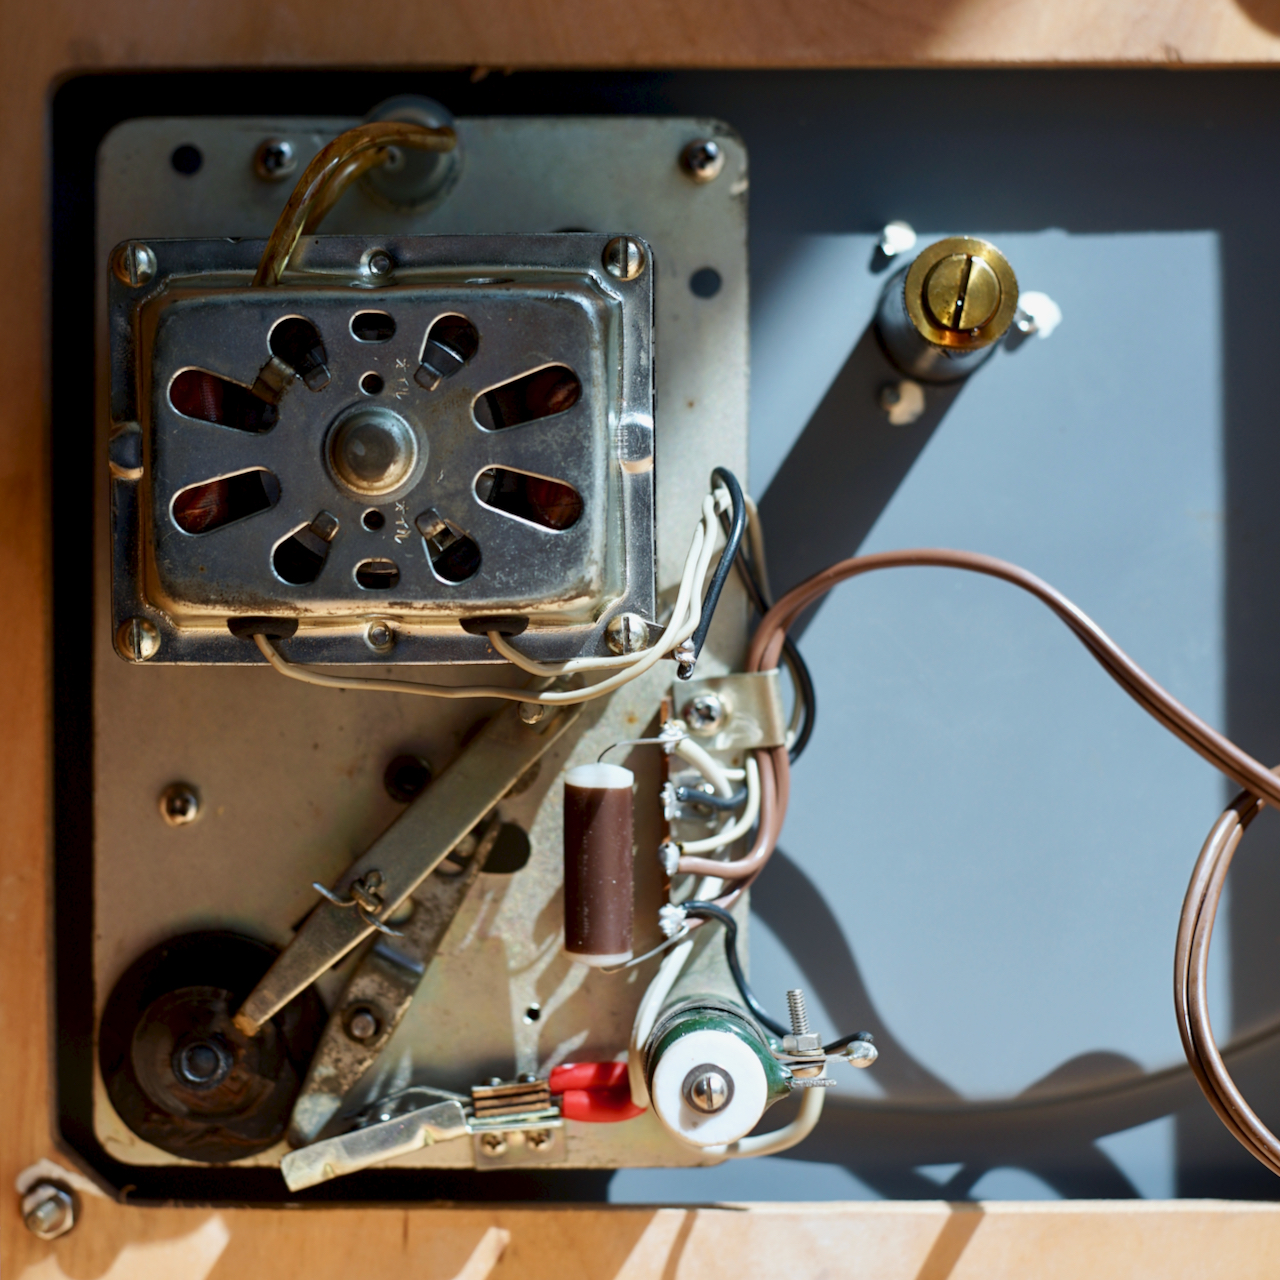
The 4-pole AC synchronous motor + switch linkage are on a sub-chassis that's mounted beneath the stamped steel main chassis.
Removing the bottom cover revealed a box. Originally, this box would have contained the tonearm, auxiliary tonearm weight, head shell, an oil vial, 45 rpm adapter, 50 or 60 Hz pulley, stylus pressure gauge and screw driver. I got the turntable with the tonearm mounted sans head shell but the 50Hz pulley + screw driver were inside the box. Sadly, all the other accessories were gone...😔
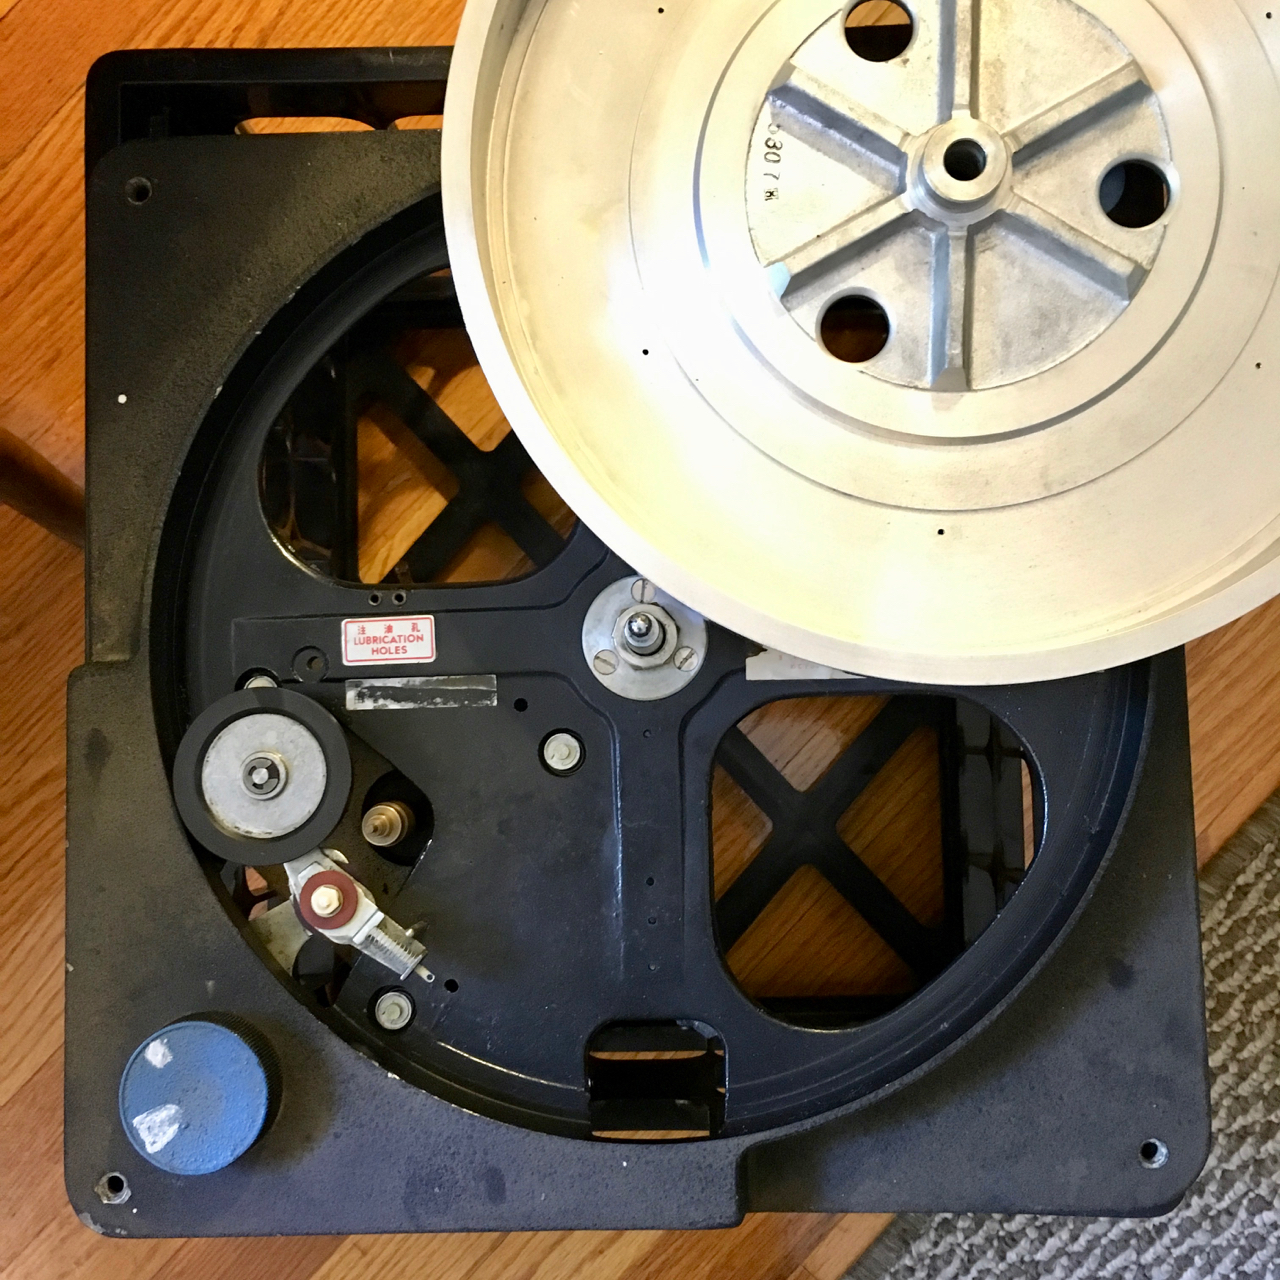
The cast aluminum platter is quite hefty at almost 2 lbs.
It's undersized at 10" (25mm) diameter but it spins on a finely machined 3/8" (10mm) spindle.
The tonearm is a very simple static gimbal type and thus, a tracking force gauge is necessary to set proper VTF. Other cartridges that match well with the relatively massive (albeit also undersized) tonearm include the Pickering V15/Stanton 500, Shure M3D + 7D, SC35C, etc. Practically any magnetic cartridge with a conical stylus that tracks over 2 grams will work well. In fact, the bearings are good enough to even handle a Denon DL103 moving coil! Watch and listen below.
Except for perished motor mounts, the unit is in excellent condition. After fitting a fresh set of rubber motor mounts, a thorough cleaning + lubrication, the unit played beautifully on its original idler wheel!
Despite the solid engineering that went into this record player, it was and still is an entry-level unit. It portrays the musical energy idler-driven turntables are known for, but not quite up to the refined standards of the Realistic MKVII or Shield MO19. That said, the videos show how much fun I had with this unit!


.jpg)