This is the final installment of my Japanese idler turntable adventure but as Sean Connery said, "Never say never again..." 😉
Sunday, September 14, 2025
Sunday, June 15, 2025
A Tribute to Don Garber of Fi + Robin and Lipman!
My first exposure to Don Garber's Fi 2A3 amp was at a gathering of burgeoning SE-DHT/High Efficiency speaker enthusiasts organized by Mike LaFevre of Magnequest and Peter Breuninger, then president of the Philadelphia Audio Society. This was held in the outskirts of Philly during the latter part of 1994. I attended to assist my friend Steve Melkisethian in exhibiting the Audio Note Kit 1 amplifier since he was the US distributor of Audio Note UK Kits, transformers and parts at that time. Sadly, these guys are no longer with us. 😔
Sunday, October 6, 2024
JE Labs Mono HiFi 2024
Over two decades ago, I ventured into single channel music reproduction to trace the roots of high fidelity. From that whole experience, I developed an aesthetic quest for a certain purity and honesty in sound, which runs parallel with my other hobby of black and white film photography! Sadly, I had to leave that particular mono set up in the attic in 2017.
Thursday, August 22, 2024
Japanese Idler-Driven Turntable Part 7: Kenwood PC350
Kenwood PC350 - a Japanese TD124 spinning a jazz tune!😉
Monday, July 8, 2024
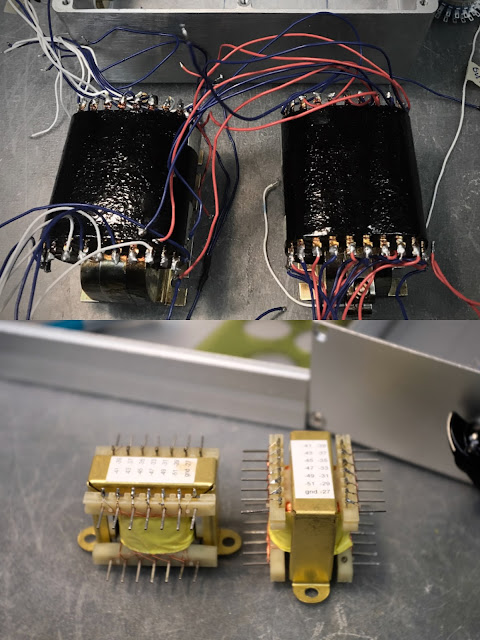
AliEx amorphous, Hashimoto HL20K6 + Sony TamRadio line output transformers
 |
| L>R: 6AH4 + AliEx, 12B4A + Sony/Tamradio and 6AH4 + Hashimoto HL20K6 |
Saturday, June 8, 2024
Two RCA derived octal phono preamps
Keen-eyed readers and visitors to my YouTube channel may have noticed the two octal phono preamps I've been using in my recent uploads. I built them for the following reasons:
- Although the Loctal EAR 834P had no problems driving the Intact Audio nickel autoformers, the 5k Ohm output Z of the Shure M65 phono preamp sounded very anemic.
- In the spirit of not leaving stones unturned and my curiosity for other sonic flavors notwithstanding, I looked back to passive RIAA EQ phono circuits I've been wanting to build, which have low enough output impedance to drive an Autoformer Volume Control.
Wednesday, May 8, 2024
Silbatone Box Adventures
 |
| from Western Electric Oscillator July 1947 |
Whether it's an open baffle as conceived by G.A. Briggs or an enclosed box like the Western Electric utility boxes above, I've always been an advocate for a wide baffle design. The wide frontal area serves as an acoustic reflector that helps propagate sound toward the listener instead of escaping to the sides and back. Somehow the wide baffle, whether open or closed, always makes reproduced music sound more alive to my ears!
A notable exception is the narrow front baffle Silbatone box designed by Dr. Stefano Bae for the Western Electric/Altec 755A. Since I uploaded the cabinet project under the auspices of Joe Roberts, it has garnered a following amongst DIYers who've reported successful results mounting other 8' drivers like the Altec 755C, 755E and the Lafayette SK98/Pioneer PIM8L.
I finally got a chance to mount and listen to my 755Cs and PIM8Ls + other 8" wide band drivers. Hopefully, this article will encourage readers to DIY this mini-monitor sized box because it really offers a lot of musical pleasure per cubic inch!
To recap, let's start with the...
Monday, April 8, 2024
Friday, March 22, 2024
Japanese Idler-Driven Turntable Part 6: Realistic Mark 8
Just like cars, a new turntable model has to be introduced every year or two to keep consumers' interest and convince them that newer is better.😊
 |
| from page 37 of the 1960 Radio Shack Catalog |
The Realistic Mark 8 improved upon the similar looking "motor unit-stye" Mark 7 in Part 4 of this series by adding a 16 rpm speed and supplying a half pound heavier cast aluminum platter.
Thursday, February 22, 2024
SE171A Amp Remastered
My dad would've turned 97 today. To celebrate his birthday, the video clip above features a recording of his favorite violinist, Nathan Milstein, playing Presto from Bach's Sonata No. 1 in G minor for unaccompanied violin. While he was doing post-graduate studies at The Juilliard School in the mid 50s, he was fortunate to have attended concerts of the great violin virtuosos of that era - Jascha Heifetz, David Oistrakh, Nathan Milstein, etc.
He would later recount that Nathan Milstein's performance of the Glazunov violin concerto was the most unforgettable! Even if he never got a chance to add this violin concerto to his repertoire, he conducted the Manila Chamber Orchestra with me playing the Glazunov violin concerto in 1987. The music of the slide clip above is the middle movement from our performance.
Before I bore everyone reminiscing about my dad and our life as musicians, let's get on with the subject at hand. The amp featured in this upload uses a directly heated triode power tube that was introduced around the time my dad was born.
Friday, October 6, 2023
JE Labs Choke-Capacitance Coupled SE2A3 amp
 |
| Canon P + Canon 50mm f1.8 LTM Foma 100 in Rodinal |
Inspired by my plate choke-loaded 76 line stage preamp adventures, I was curious how a similar driver circuit configuration would sound in an SE2A3 amp. So I pulled out my Radiotron Designer's Handbook, 3rd Edition to gain a better understanding of choke-capacitance coupling (aka plate choke loading) vis-à-vis resistance coupling.
Below are highlights of relevant information I gathered.
Saturday, September 2, 2023
Japanese Idler-Driven Turntable Part 5: Lafayette PK300
I bought this Lafayette PK300 idler-driven turntable because it looked like an improved Shield MO-19 (aka NEAT P58H) with the added feature of an eddy current pitch control as found in the Garrard 301/401 and Thorens TD124.
Friday, August 18, 2023
Ortofon STM-72 + Weller WTCPS repair + Hakko FX-888D
Friday, July 7, 2023
Japanese Idler-Driven Turntable Part 4: Realistic Mark-7
Friday, June 23, 2023
JE Labs Plate Choke Loaded 76 Line Stage Preamp
I acquired this pair of James JS 4120N, 200H @ 15 mA nickel plate chokes from Keith Tan of Euphonia Audio in late '04. Due to my busy performing and teaching schedule back then, they remained boxed up close to two decades.
After going home with me to Manila and back stateside, I finally found time to try the JS 4120Ns in my preamp. After adjustment of voltages and operating points, I was impressed by the increased detail and resolution brought forth by replacing the Allen-Bradley plate load resistors while retaining the sonic aura I've come to treasure from my Bruce Berman-derived 76 > 1/2 6SN7 line stage circuit from Sound Practices Issue 13.
Unfortunately the JS 4120Ns have been out of production for quite a number of years. 😞
!!!WARNING!!!
The voltages in this project are potentially lethal! Proceed at your own risk!
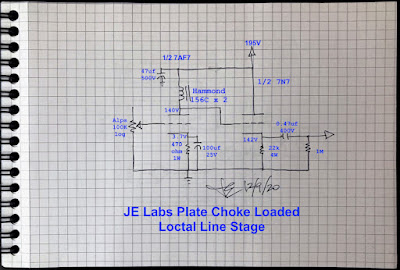 |
| NOTE: According to the 7N7 data sheet, it has a maximum cathode to heater (filament) voltage rating of 90V. To get around the 142V at the cathode, I lifted the filament potential 65V above ground via a voltage divider network in the B+ supply. Hence, 142 - 65 = 77, which brings it back to spec. |
 |
| 100 Hz, 1 kHz and 10 kHz square wave output from 2 x Hammond 156C plate choke loaded 1/2 7AF7 + 1/2 7N7 cathode follower |
I tried the budget-friendly Hammond 156C plate load chokes in the circuit above on my loctal preamp as well as on my main preamp with the 76 line stage below.
Detail improved but I missed the micro dynamics and organic quality in the midrange of the JS 4120Ns. That said, I'm now using this topology in the nosTDA1541tube DAC in my main hifi set up. Meanwhile the loctal preamp line stage has been reverted back to its original state with Allen-Bradleys.
 |
| NOTE: This choke saturates instantly past 8 mA! |
Since the Hammond 156Cs are easy on the wallet (just like the 125ESEs I wrote about decades ago😉), why not try and judge for yourself? If you hear potential, then proceed to the nickel plate choke-equipped circuit below.😊
 |
| Custom wound Intact Audio 250H nickel plate chokes |
I was so impressed with Dave's nickel plate chokes👏 such that I ordered a pair for myself so I could use the JS 4120Ns for other tubes and circuits. I also confirmed that in order to get the most out of the plate load choke topology, one needs a competent winder, and nickel should be part of the equation!
 |
| Even if I always used more rugged 6SN7 GTA and GTB types in the cathode follower section, when I built this preamp over two decades ago, the power supply was configured so that the filament potential was about 75V above ground. |
I've always admired the sound (or more appropriately, the lack thereof) of nickel permalloy, having owned the Tamura F7002 and Tango NY15S since the 90s. Even if these output transformers are hefty beasts, which helps the low frequencies, it's not their bass response that captivates the listener. Instead, they present a very natural midrange replete with rich and harmonious overtones, which are virtues I also hear with Finemet.
 |
| 100 Hz, 1 kHz and 10 kHz square wave output from an Intact Audio nickel plate choke loaded 76 + 1/2 6SN7 cathode follower |
After praising the merits of exotic core material, I wouldn’t want readers to get the impression that nickel or Finemet are the quintessential elements to great sound. Tube choice, circuit topology and operating points, parts selection, etc. not to mention the synergy of components in the hifi chain, all contribute to the sonic stew. That's why I encourage audio hobbyists to listen and experiment so that they can carve their path towards their own musical satisfaction.
Although this video is merely a proof of concept, I got inspired and used my Sony A7II + Voigtlander Ultron 28mm f1.9 LTM lens mounted on a tripod rather than my usual iPhone. So plug in your Koss Porta-Pros or Sennheiser HD6XXs and (hopefully) enjoy!🎶🎹🎻
Maybe 🤔 I'll talk about my plate choke adventures with SE amps next time!😉
Saturday, May 6, 2023
Saturday, April 15, 2023
Saturday, March 18, 2023
Musicmaster Model 12 (Gray clone) Tip + GE VRII Hack
 |
| Canon P + Canon 50mm f1.8 Foma 100 in Rodinal 1+50 |
After many decades of collecting and using classic audio equipment and film cameras, I've learned to accept that sometimes I win, sometimes I lose, but most of the time I break even. And the only reason there is that possibility of breaking even is because I learned to DIY.
This tonearm came with a KS Musicmaster Model 25B12GST idler-driven turntable, which I thought I could resuscitate. Alas, the turntable was beyond saving because a lot of important parts were missing. The tonearm had no head shell slide and the cartridge pin contact points + wiring harness were gone. For many years this tonearm was boxed up along with other parts units sitting in storage.
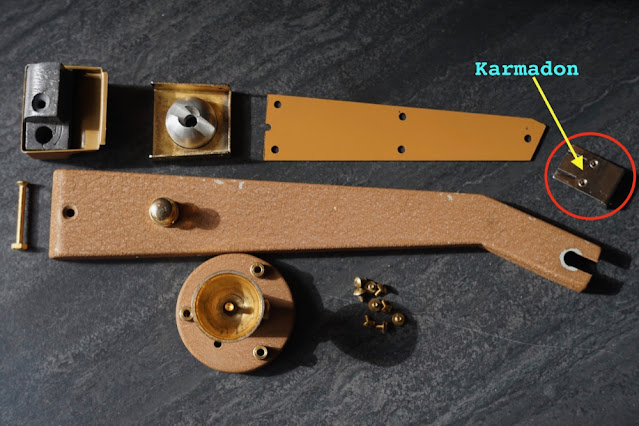
One day I had an epiphany - will the Karmadon head shell slide fit?
I'm happy to report that the two types of head shell slides that my buddy, Sergiy, manufactures for his Gray Research tonearm clone work on this Japanese clone as well as on my original Gray Research 108C. Above left is a solid shell and on the right is a shell with a hole to accommodate the triple play feature of the General Electric RPX and VRII mono cartridges.
Despite the carnage brought upon the Ukrainians by a deranged autocrat, my Karmadon head shells arrived in less than two weeks. We really have to admire and support these people!
I rewired the tonearm and blu-tacked 4 pennies to make up for the lost hardware.
Since the Karmadon head shell slide is lighter than the original, I used all three copper weights Sergiy provided, added 2 x 5 centavo coins + the GE VRII cartridge = 25 grams.
Voila!👍
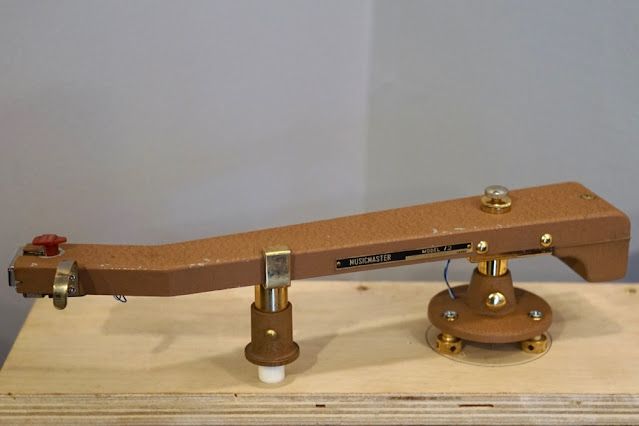 |
| For more viscous damped tonearm set up information, please click here! |
Even with my 20+ years of experience using this tonearm, it took me a while to dial-in the proper weight compensation due to the missing hardware + adapted head shell slide. Getting a viscous damped tonearm to function properly isn't for the faint of heart and requires patience. If you don't possess these virtues, I suggest you don't consider using one. But I must say the results are well worth it!😊
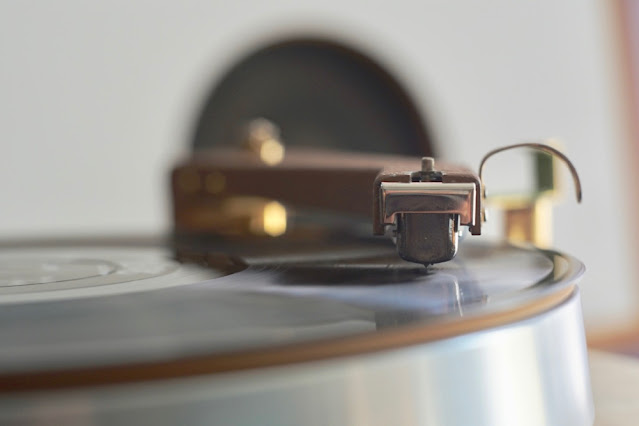 |
| Musicmaster Model 12 + GE VRII |
Let's listen to a few monaural hifi tunes!
🎶🎻🎹🎷
Saturday, March 4, 2023
Japanese Idler-Driven Turntable Part 2: NEAT P58H/Shield MO-19
Saturday, December 3, 2022
JEL Loctal Phono Preamp + Tube Shields
Before taking the preamp out of the system for a thorough check up on the test bench, I searched for a couple of tube shields from my parts bin.
Voila! The unusual hum and noise vanished.👍


